GLC Earthquake Fighting
Quaker Oats - Earthquake Fighting GLC
2025 has been a rather eventful year so far - as of writing this I have managed to acquire four badges and I’m in eager pursuit of my fifth! One of the badges in question was the Fighting badge, which I managed to secure using one of the oldest strats in the book: Earthquake. Wheatr very kindly reached out and asked me to write this article about my take on the archetype as well as my approach to building this list. By no means do I consider myself to be an expert in the type so I’m more than open to critique and discussion around the list over on discord 🙂

Addressing the Elephant in the Room
For those who’ve asked, ‘Quaker’ is a brand of porridge oats hence the name…I’m aware that I’m probably the only one who found the name funny and will admit that this name alone was the primary motivator when building this list. I’m not sorry.
Why Earthquake?
All silly naming conventions aside, Earthquake as an archetype has always really appealed to me as a player. The low cost, hard hitting and aggressive playstyle is what I tend to look for in my builds. With some newer, powerful additions to Fighting’s card pool, I felt that EQ had some pretty strong prize trading potential despite its self damaging drawbacks. I’ve recently been inspired to pick up Fighting again by innovative players such as TVBoy with their Extreme Speed Fighting list, Zman’s Penny Loop list and of course Castella’s Hitmonbros list that initially got me onto the Fighting train in the first place over a year ago. But also, I just wanted an excuse to buy the Vivid Voltage Donphan promo as it’s one of my favourite cards.
Earthquakers

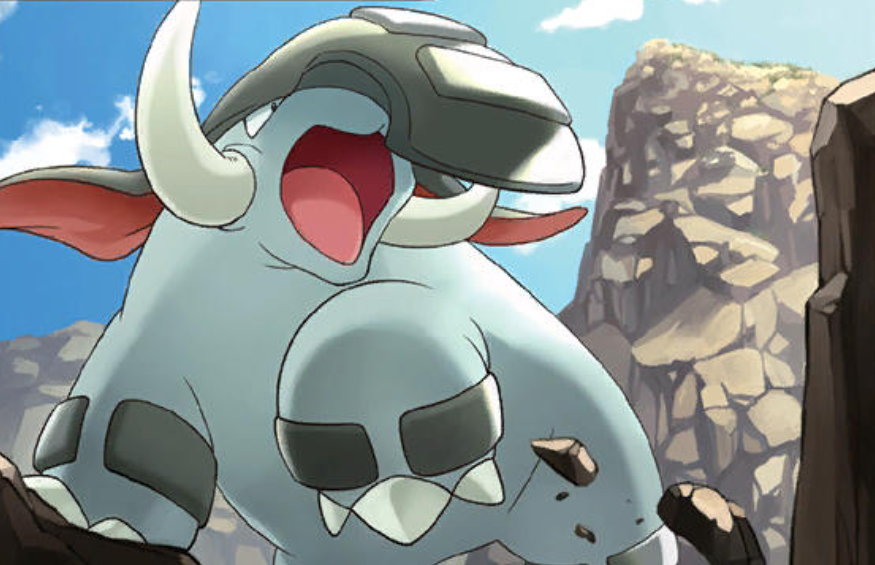
The namesake of the archetype comes from it’s two Earthquake users: the aforementioned Donphan from Vivid Voltage and Whiscash from Rebel Clash. Admittedly it’s not 100% necessary to have two quakers, but having two provides a good level of redundancy if a piece is prized, allows for more consistent combos and ultimately gives the deck a stronger identity. The gen 2 powerhouse Donphan is usually the go to quaker, as 120 damage for a single fighting energy is incredible in the early game. With 150HP, Donphan’s bulk can allow it to stick around for a couple of turns early game against set up decks as your quakes can go unanswered by your opponent. At a glance 120 damage might seem a bit underwhelming, but any concerns of damage output are quickly thwarted when you realise the multitude of damage modifiers the Fighting Type has in its arsenal. For example, the stadium Martial Arts Dojo allows you to hit for 10 more damage if you have a basic fighting energy attached, allowing Donphan to overcome 130HP basics and most stage 1’s. Alternatively a Guzma and Hala is all it takes to apply massive pressure as you can grab both Muscle Band and Strong Energy for a turn two 160 damage EQ! (I’ve even been able to pop off with Phanpy using this combo in curtain match ups.)

Whiscash, aside from being a neat and all-round silly little guy, takes a bit more set up to get going compared to Donphan but still provides more than adequate value. 140 damage for 2 Fighting energy is very respectable and can be paid for quickly with cards such as Karate Belt and Raihan in a pinch. It also benefits even more than Donphan from the damage mods that we previously covered, allowing it to take out larger threats than the Don. 140HP is great for a stage 1 and can be kept unscathed by it’s rather handy Submerge ability which prevents any damage from your opponent’s attacks, and your Earthquakes, whilst on the bench. Even Barboach can come in clutch as well with it’s Hide attack, that for one fighting energy can prevent all damage done to it by attacks on a coin flip. This can buy you that extra turn you might need to help you setup or find a key card.
All of my evolving basics, Barboach, Growlithe, Phanpy and Riolu have 70HP. This allows all of my little guys to survive up to 3 Earthquakes before going down as Donpahn and Whiscash only do 20 damage to the bench. This gives me the maximum amount of time under Earthquake to find my evolutions before letting up on any offensive pressure. This also gives cards like Buddy-Buddy Poffin great setup value as well as preventing the very real threat, Raging Bolt, from taking a bench snipe KO on turn one.

The Follow Up Attackers
If you’ve gone down the route of turn two Donphan attack you will most likely have some damaged mons on your bench. Once your Earthquakers have done their thing and gone down you can send up either Hisuian Arcanine or Lucario.

Hisuian Arcanine from Twilight Masquerade is a great addition to this archetype as it has great synergy with Earthquake. It’s Proud Fangs attack does 30 damage plus 90 damage if any of your benched Pokemon have any damage counters on them for zero energy. After an Earthquake this is by far the most efficient attacker in the deck and with the help of the previously mentioned damage mods can maintain the pressure you applied with your Donphan.
Lucario from Scarlet & Violet is an absolute beast and is one of my favourite revenge attackers in the game. For one Fighting Energy you can hit for 150 damage if your opponent takes a KO on any of your Fighting type Pokemon. In the event that you go behind on prizes after your opponent K.O’s something, coupling Lucario with Martial Arts Dojo provides an additional 40 damage if you have more prizes. That combined with a muscle band allows you to clear the 200 damage benchmark with a huge 210 power Avenging Knuckle (an additional strong energy pushes this even further to 230 damage!). Accelerating Stab rarely comes up due to it’s higher cost, but it can be beneficial to have access to another 120 damage move in some niche circumstances. Lucario provides quite an oppressive presence when hitting the board and can be used as an effective answer to aggressive play to keep you in the prize trade. I prefer this Lucario over the self damaging Roaring Resolve Lucario from Brilliant Stars as I think that discarding the energy for the latter's attack doesn’t compliment my low to the ground agro playstyle. I believe that I’ve found more efficient ways to set up Arcanine and overall I think that Avenging Knuckle is too good of an attack to pass up in my opinion. I play Detect Riolu for the exact same reasons as the Barboach, as that too can buy you a turn on a coin flip.

I mean we all saw this coming. Okidogi from Twilight Masquerade is almost an auto-include in every Fighting type list due to its fantastic ability, efficient attack costs and it’s recurability. By playing 3 multitype special energy, Aurora, Rainbow, Unit (and Counter if you’re in a truly dire situation) you can easily fulfill the Dark energy cost for the ability clause and the Fighting energy attack cost simultaneously. Dogi’s massively buffed 230HP stat will almost guarantee you can soak up a hit and retaliate with a buffed 170 damage attack. The aim with Dogi is to swing the prize trade in your favour by going at least 2 for 1 or to just bulldoze your opponent in early game and go unanswered. Admittedly Dogi isn’t as spammable in an Earthquake build compared to other Fighting lists as you have to be careful not to bench it carelessly to avoid taking unnecessary damage and worsening Dogi’s longevity. With careful planning, sequencing and timing you can easily work around this issue. Dogi is a great answer to your opponent’s bigger threats by acting as a wall breaker and a wall to smaller mons simultaneously.

Sudowoodo, on top of being another killer gen 2 mon like Donphan, acts as another strong revenge attacker in addition to Lucario. Sudowoodo’s Watch And Learn Attack acts as a Copycat attack much like that of Mimikyu or Zoroark. This makes it an excellent follow up attacker against threats that hit really big numbers like the special whales (Ceititan & Wailord) or big revenge attackers (Druddigon, Lucario & Zamazenta). Using comeback cards like Karate Belt, Raihan, Rosa and Counter Energy to power up Sudo quickly can allow you to even out the prize trade if you fall behind as well as removing difficult to handle threats.
Notable Items
This deck runs a pretty standard item loadout with many staples included. I personally prefer my items to search for exactly what I need over turbo items to guarantee getting exactly what I want at any given time. There are however a few notable item choices that I think are worth mentioning.

I think that Damage Pump is a pretty important inclusion in the list and has helped me get around some rather awkward/niche situations. Damage Pump allows you to move two damage counters from one of your Pokemon to any of your Pokemon in any way you like. This means you won’t be missing out on any full powered Arcanine attacks if Arcanine finds itself being the only mon with damage counters on in the active. It also allows for more aggressive Earthquake spamming as moving damage counters could mean the difference between another attack or knocking out one of your benched mons. It helps Okidogi in particular heal off Earthquake chip thus improving its longevity. It’s also particularly important in resetting one of the best tools in the deck, Focus Sash, as if the Pokemon Focus Sash is attached to would be KO’d from full HP they would survive on 10HP. Surviving a hit can be super crucial to winning the prize trade and Damage Pump can work as a way to keep you ahead by a narrow, yet significant margin more times than not.
Magma’s Great Ball is an incredible addition to Fighting’s tool kit and is one of my favourite cards mechanically and aesthetically. As I'm playing a low energy count of 4 basic Fighting energy, being able to search out energy in a variety of different ways is invaluable as it increases my odds of attacking each turn. The best part about playing MGB is that it can turn Ball Guy into an energy search option, therefore greatly increasing the versatility and value of that supporter by playing into the ‘go fast hit hard’ mentality of the deck.
We’ve previously touched upon the power of Guzma & Hala due to the combos it enables, so naturally I’ve opted to play Tag Call in order to maximse my chances of achieving said combos. It can also grab the other Tag Team supporter, Mallow And Lana, for a cheeky switch and heal up to 120 HP or provide discard material for Guzma & Hala.
I’ve opted to play Night Stretcher over either of the rods as the immediate resource replenishment to hand is far more effective for chaining attackers and staying in the game.

Lastly, Trainer’s Mail and Pokegear 3.0 are two turbo cards I do deem essential in a type like Fighting that lacks the draw support of other types. You need to give yourself every chance you can get to find that key item or supporter in order to string together your attacking combos.
Tools

As previously stated, Focus Sash and Karate Belt are two brilliant tools available exclusively to the Fighting type. Focus Sash mainly acts as an answer to the unfavourable Psychic Type matchup, specifically allowing Okidogi to survive a hit and hopefully go 2 for 1 in prizes. Karate Belt decreases the attack cost by one fighting energy if you’re behind on prizes which can allow for some explosive comeback potential if you find yourself going behind - ‘a free Avenging Knuckle? Yes please!’ Float Stone is a must for getting your bulkier mons out of sticky situations and Muscle Band, as previously mentioned, helps you clear those higher damage thresholds to take key KO’s.
Supporters
I’m not sure who originally said this but when I heard this I immediately made it my ethos when building any Fighting list: ‘when it comes to Fighting, every supporter needs to be powerful and make a difference when played.’ Fighting needs all the help it can get from it’s Supporter pool to compensate for a lack of engine so I’ve opted to play a whopping 16 supporters.
Draw Supporters

Arguably the most important kind of supporter for Fighting, so I’ve included 5. In my experience, Fighting doesn’t like to discard too many cards as it needs as many options as it can get. Because of thi, I’m predominantly playing Supports that put cards back into the deck to be used later when the time is right.
Iono and Marnie provide good disruption whilst allowing you to draw forward into your deck by placing cards at the bottom. Similarly, Kofu provides brilliant resource management by saving those unwanted cards for later and drawing you 4 cards deeper into the deck. Unlike Marnie or Iono, the selective nature of Kofu allows you to keep the most useful cards in hand. This increases your chances of finding more relevant combo pieces for the situation you currently find yourself in as opposed to rolling a dice with a shuffle draw supporter like Cynthia.
Professor's Research does seem a bit counterintuitive to my previous points, but it’s undeniable draw power can really put you into strong positions with careful playing and can fish you out of dead hands. It could also be used to bin off any unwanted dead cards late game that might have lost their purpose. Research could be subbed out for a less destructive draw supporter like Cynthia or a conditional draw supporter like Cynthia’s Ambition.
Lastly my favourite draw supporter, Tate & Lisa, provides a great deal of versatility with an optional switch effect instead of the shuffle draw 5 effect which has gotten me out of difficult situations countless times.
Searchers

Having a range of supporters that can find a large variety of different types of card is undeniably powerful in any deck, but more so in Fighting. Because tools, stadiums and energy search are so important in this deck I’m playing Arven and Colress’s Tenacity on top of Guzma and Hala to aid in setting up and enabling combos. Colress’s Tenacity in particular is great for fetching a Strong Energy/Martial Arts Dojo combo or a much needed special energy for Dogi. On top of searching for Pokemon and damage mods, Arven and Guzma and Hala can provide outs to switches in the form of Escape Rope and Float Stone to help you out of the active.
Ball Guy gives you access to your entire Pokemon roster, energy and is great for thinning cards to boost consistency. Korrina is the Irrida of Fighting, fetching you a Pokemon and an item of your choice, allowing for great early game setup, evolution search or establishing your next attacker.
Two of the most important searchers and comeback cards are Raihan and Rosa. A lot of the time your Pokemon, aside from Dogi and maybe Donphan, are probably going to go down after they’ve fired off an attack so ideally you want to capitalise off of that mon’s sacrifice and properly avenge them. Raihan will accelerate an energy from your discard pile to your eagerly awaiting revenge attacker and then allows you to find any card of your choice thus opening the door for massive combo potential. Rosa, whilst more specific than the aforementioned Raihan, more times than not provides you with everything you need to mount a comeback. After your opponent takes a KO, Rosa will search out any Pokemon, Trainer card and a basic energy which in my opinion is more valuable than Teammates as Rosa provides more pieces that can enable a follow up attack or even set up another benched attacker. I’ve lost count of how many times Rosa has allowed me to set up Lucario for a revenge kill.
Gust and Switch

In my opinion, both Boss’s Orders/Lysandre and Guzma are auto includes in a hyper aggressive deck that aims to take a KO every turn. Having free reign over what gets put in the active can really disrupt your opponent, as removing a key piece can greatly raise your chances of pulling ahead in the prize race.
Guzma, much like Mallow & Lanna and Tate & Liza, is a great way to reposition yourself for another attack or to free yourself from a sticky situation. Lucario tends to get stuck in the active after an unanswered Avenging knuckle which can really slow you down and give your opponent time to recover. Fitting in plenty of switch options in the form of supporters gives cards like Escape Rope and Float Stone much needed redundancy and improves the overall tempo of the game.
Recovery

As I’m only playing stage 1 lines and basics, Klara add’s great recursion value to the deck in the same way that Night Stretcher does but on a much larger scale. The two stretchers and Klara provide more than enough recovery to see you to the end of the game. Iono, Marnie and Kofu prevent these recovery cards from clogging up your hand when you don’t need them and stash them for when they’re needed.
Stadiums

The Artazon of Fighting and Water, Brooklet Hill, is very important for setting up early game and recurring basics whilst locking out non Fighting and Water players from benefiting from using it. We’ve previously touched upon how busted Martial Arts Dojo can be in the Lucario and Donphan section, so instead I want to mainly focus on the inclusion of Chaotic Swell in the list as it has been a very valuable and important inclusion.
Chaotic Swell discards itself and any other stadium that tries to bump it. Usually you see CS in lists that really value their bench sitters, namely Grass, Water, Psychic and Colourless as cards like Parallel City can be truly devastating to those type’s engines. Unlike the aforementioned types, Fighting doesn’t have an engine to protect so what’s the point of the swell? CS has two purposes in the deck: protection against other nasty stadiums and disrupting other types.
Stadiums to defend against

Fighting doesn’t tend to play a lot of abilities, but the most important ability of them all is Okidogi’s Adrena-Power as that enables it’s insane power. A well timed Silent Lab from your opponent turning off all basic pokemon’s abilities can be devastating, as it removes Dogi’s buffed up stats. This is especially true if Dogi has soaked a big hit, as your opponent could get a KO with a follow up attack or by simply playing the stadium if Dogi has over 130 damage on it. CS allows for an additional layer of protection against this form of counter play and greatly increases the effectiveness and longevity of the big green dog.
As this deck wants to recycle it’s attackers, another nasty stadium to look out for is Lost City. Having one or more of your attackers removed from the game is extremely detrimental when chaining attackers. Locking your opponent out of this option with CS is very important in order to maintain your game plan of constant offensive pressure.
While much more niche than the previous two examples, Temple Of Sinnoh can be a real pain as it can shut off all the effects of special energy. Much like Silent Lab, this is very bad news for Dogi and can prevent you from using Counter Energy as a comeback card so it’s worth keeping this stadium in mind.
Stadiums to disrupt

In the unfavourable match up against Psychic, a stadium like Chaotic Swell can give us more of a fighting chance. Psychic loves to abuse the incredibly powerful Dimension Valley stadium to decrease their attack cost of their more expensive attackers, such as Giratina, Gallade and Necrozma, to apply massive offensive pressure. CS is a very good way to slow down Psychic’s offence and could even buy you another turn to attack or set up.
Being able to lock your opponent out of basic Pokemon search by blocking Artazon, Brooklet Hill and Stormy Mountains can really disrupt their set up in the early game as well as apply huge offensive pressure if you can start taking KO’s.
Being able to deny helpful stadiums that play into specific strategies like healing, self damaging and energy recycling can make certain match-ups a lot more favourable.
Energy
Due to the low cost and efficiency of the deck I only play 4 basic energy. Due to this, it provides plenty of space to fit a bunch of special energies! Like we discussed in the Okidogi section, the multi-type special energy really ensures that Dogi can get online fast and be recycled if KO’d. However they do provide some extra synergy outside of powering up the big green dog and can be utilised effectively by other mons.

Rainbow energy is yet another way to place a damage counter onto one of your Pokemon, thus allowing Arcanine to swing at full power. Aurora is rather handy at fully powering something up in a pinch when used alongside Raihan, as you could discard a basic Fighting energy when attaching Aurora and immediately accelerating it with Raihan - I’ve done this combo a lot with Wishcash, Sudowoodo and of course the Dogi. Similarly, Counter Energy has been really great in evening out the prize trade if you fall behind by providing two of any energy - Sudowoodo loves making Special Whales Watch and Learn with it’s Counter Energy.
The Strat
Unlike my writing, the strategy of the deck is pretty simple and to the point:
‘Go fast + Hit hard = Win’.
Despite this caveman-esque approach, there is some nuance in the execution of this strategy, as certain match ups require very specific sequences in order to achieve a win. Ultimately, we want to out trade our opponent by overwhelming them with attackers until they can’t respond. In order to achieve our win condition, we need to consider the current and future board state and know what attackers to prioritize.
Unlike other Fighting/aggro decks, this build really doesn’t mind going first and most of the time wants to go first! This is because you want to prioritise getting your evoliving basics down with energy attached as fast as possible, so they’re ready to evolve the following turn to swing. Evolution Incense, Evo Soda, Ultra Ball, Arven, Ball Guy and Korrina all greatly aid you in finding that evolution for that first attack. Additionally, starting with Dogi and attaching either a basic or special energy on turn one is incredibly intimidating for your opponent. Make sure to exercise some caution when attaching your special energy straight away just in case your opponent plays a way of removing special energy like Enhanced Hammer or Faba. If you know they don’t play special energy removal then attach away and make ‘em pay on turn two.
When I think of Fighting’s playstyle, I imagine it like a conveyor belt in a supermarket or Sushi restaurant - you want to feed your opponent the appropriate Pokemon at the correct time in order to maintain momentum by taking a KO as well as being ready to respond to being KO’d.
For example, if you’re playing against a deck that requires set up with small evolving basics like Grass, Psychic or Water, you should start aggressively with your Earthquakers and close out the game with Dogi and Lucario:
Donphan → Arcanine/Whiscash → Lucario/Dogi recycle.
In my experience against Psychic, the Earthquakers into Dogi/Lucario route have been the most effective as you can pick off key support mons and threats such as Ralts, Natu, Mew and Inkay using your gust options before they have a chance to become problematic.
Alternatively, if you’re up against a big basic turbo build like Colourless, Dragon, Dark or Fighting, try to priorities Dogi first and then set up an Earthquaker/Arcanine in the back to continue applying pressure after Dogi and Lucario inevitably take damage or go down:
Okidogi → Lucario → Donphan → Arcanine → Repeat.
Sudowoodo can be subbed in for situations that require you to deal with a particularly big or unique threat that can be quickly dealt with by a Watch And Learn.
Using your KO conditional supporters like Raihan and Rosa is super important in your quest to snowball out of control. You can manipulate the tempo of the game by preempting when you’ll be KO’d next (and by what) so that you can adequately respond and reposition yourself to repeat this process. For example, it’s usually more favorable for your Lucario to be knocked out after an Avenging Knuckle, as opposed to it being stuck in the active, so you can send up your next attacker or use Raihan or Rosa to set up a follow up attacker! It’s pretty easy to recycle your attackers with the recovery options available so there is great merit to knowing when to sacrifice a piece in order to progress your game plan - Klara is fantastic in the mid/late game for this.
Tough Matchups
Spread decks are definitely something to be more careful when playing against as the self damaging aspects of Earthquake can work against you more than they normally do. Against spread I would recommend going first with the aim of setting up Dogi as fast as possible to take quick KO’s and to soak damage. Any damage placed by spreaders can more often than not be fully healed off using a Mallow & Lana as well as using Damage Pump to help distribute the damage elsewhere. Make sure to stagger your bench to avoid building too much damage and use your quakers sparingly. The one benefit to facing spread is that you’re almost guaranteed to have Arcanine online at all times so you can retaliate rather consistently. Lightning tends to be the most popular form of spread in the current meta which is great seeing as Fighting can pretty much hit all of the mons for weakness excluding Zapdos. Whiscash also laughs in the face of spread with it’s Submerge ability and respectable bulk.
No surprise to anyone, the Psychic match up is incredibly difficult as most of the mons resist Fighting for -30 damage… As previously stated, taking out the small basics is key but also identifying the other key weak points in Psychic’s engine to take advantage of can swing the game in your favour. For example, Refinement Kirlia should immediately be disposed of, not only because Gallade is a nightmare for Fighting to deal with, but Kirlia should be an easy KO as it doesn’t actually resist Fighting! Other staples in Psychic like Malamar, Necrozma, Tinkaton and Wobbuffet also don’t resist Psychic so can be targeted down for easier KO’s. Arcanine, Donpahn and Whiscash are great for taking KO’s into these non resistant mons and the smaller basics as well as not being weak to Psychic themselves. Using your damage mods on top of this to try and mitigate any resistance along with careful use of Focus Sash can make this match up winnable with some work.
Psychic Spread on the other hand, is in my opinion the worst matchup. Munkidori in particular is public enemy number one in this matchup and should be removed from the game as soon as possible. It can greatly limit your earthquake attackers and break your Focus Sash by moving damage counters over to your mons whilst healing their teammates. Paired with Giratina that resists and is constantly dishing out damage counters for the Munki to throw at you proves to be a very strong counter to this deck - I learnt this the hard way in my playoff round against Wheatr. Similarly to Lightning spread, I think starting with Dogi and setting up as fast as possible with an Arcanine and Lucario in the back, ready to follow up with damage modded attacks is your best bet in this match up. Try to only play down your Focus Sash only when it’s absolutely necessary, as Okidogi surviving a hit against a Gallade for example could be essential for keeping you in the game. Removing Kirlia and the Munki as well as healing off any damage using Mallow & Lana to keep Dogi healthy are your main priorities.
Cuts and Considerations
Luxurious Cape

There is a strong case for Lux Cape to be in this list and could better my match up into Psychic and other heavy hitting mons. The risk of giving up two prizes is too much of a detriment for a deck that’s trying to win the prize race one prize at a time. The weight of giving up two prizes could swing the game out of my favour drastically but despite this I would like to revisit and test Lux Cape again in this list.
Lost City

Similarly to Lux Cape, Lost City is a high risk high reward kind of card that I’ve been hesitant to try in this list. If I lose a single attacker then that's pretty much game over for me and the likelihood of something being Lost Zoned is highly likely with Earthquake’s self damaging shenanigans. That being said, the value of Lost Zoning threats could make unfavourable match ups like Psychic much more favourable if i could banish some of their key pieces in the early game. As polarising as the card is and the fact that I’ve seen success with it in previous builds (Rillasaur Grass of all things) I would be lying if I said I wasn’t a little tempted to try out Lost City.
A 7th Basic

I’m sure I'm preaching to the choir when I say that I despise mulligans. Because of this you’ll rarely ever see me playing decks with less than 7 basics. But as you can see, I’ve finally taken the plunge with this build and opted for 6 basics in place of more evolution based consistency, which for the most part has been working out. Some of you might remember me playing Zygarde from Vivid Voltage which provided great bulk as an EQ damage sponge, donk potential with it’s Beam attack as well as decent comeback potential with a 160 damage Core Avenger using Counter Energy if I went behind. Whilst I liked this card, I found myself not wanting to use it very often as it was quite clunky and required too many resources to do anything significant.

I later opted for Passimian from Cosmic Eclipse, as its Spike Draw attack did 20 damage for one Fighting energy and allowed me to draw 2 cards. On paper I thought the extra draw power would be a solid option at the start of the game to speed up my setup, but ironically I found that I would always favor a strong draw supporter over the monkey and all the while wishing that they weren’t in the active in the first place. I considered other basics that synergise with the self damaging side of Earthquake such as Great Tusk and even Throh but they turned out to be rather inefficient or underwhelming to use. I quickly learnt that having a basic for the sake of having a 7th basic wasn’t actually helping with the offensive consistency I wanted out of the deck, so the cut down to 6 mons felt like the correct choice allowing me to fit Evosoda into the list. As a result I’m going to be practicing my shuffling and crossing all fingers and toes for no mulligans.
Stage 1’s with Earthquake Synergy
There are quite a few mons that benefit greatly from the self damaging aspects of Earthquake, some of which are really strong on paper. Aside from Arcanine and it’s insanely efficient Proud Fangs attack, I decided against leaning into these synergies too much as in testing they felt far too situational and inflexible to use consistently. That being said, I think it’s worth giving some key cards an honourable mention as I think they're really unique and have great potential!

When I first built this deck I had included Runerigus for it’s great synergy with Earthquake and crazy damage spread potential. For a double colourless you can spread 2 damage counters on your opponent’s Pokemon for each damage counter on Runerigus - that coupled with a HP boosting tool would make a Sableye blush. When paired with higher self damaging Earthquake users such as Steelix from Sword & Shield or Krookodile from Scarlet & Violet, I could see Runerigus being much quicker and far more consistent to set up. Definitely a mon I plan on revisiting in the future!
The Single Strike Primeape from Battle Styles is a favourite of mine because of it’s INSANE damage potential when you have a fully loaded bench of damaged Pokemon. It’s Steamin’ Mad Strike can reach 250 damage which is able to one hit KO the new Wailord! It also would allow me to play the Mankey from Scarlet and Violet for added donk potential on turn one going second when coupled with Guzma & Hala.
Grapploct from Surging Sparks is a funny little freak that is able to do 130 damage for one Fighting energy if Grapploct has any damage counters on it. Whilst not as reliable or consistent as the other attackers in this list, it’s hard to deny that a single Rainbow Energy attachment for 130 on turn two is a pretty damn good combo.
The Machamp Line

This is probably the most likely change I’d make to this list. Machamp from Lost Origin is a one mon army in it’s own right, boasting 300HP from it’s Crisis Muscles ability at the end of the game as well as being able to hit 200 damage for 2 Fighting energy. Machamp’s huge bulk and efficiency could provide a lot of value to this deck, particularly when it comes to closing out games. Initially I was concerned that the self damaging nature of Earthquake would be too detrimental to Machamp, as Machoke would be bench sitting and soaking damage for a large majority of the game. Now that I’ve had some experience playing around this issue with Okidogi, I think I could apply the same logic to Machamp. The only downside is that it’s a stage 2 line that requires a lot of space in an already tight list and could affect the list’s consistency and speed. With the power creep of Journey Together on the horizon (I’m looking at you Wailord), the added muscle of Machamp might be a welcome addition to the list. As we just mentioned, playing Machamp would also allow me to play Machoke from Guardians Rising. This incredible utility mon provides the best bench barrier in the game with it’s Daunting Pose ability that protects your bench from both damage and effects of attacks, thus making spread matchups significantly more bearable.
Weird Niche & Meme Cards
On the topic of bench barrier and damage protection in general, I have considered the stadiums Mountain Ring and Sky Pillar. Not only do they protect against spread strategies but they can also protect your bench against your own Earthquake damage if you've taken too much of a beating! A card like this can provide a lot of role compression in comparison to Machoke, but can be easily dealt with by other stadiums and cards like Field Blower. This would probably require stadium recovery like Luscamine which does lower overall consistency.
Like every Fighting player I went a bit insane trying to find a way to make the Psychic match up more favorable for me. Magnetic Storm is an interesting card that removes the resistance of all Pokemon in play. This would make awkward Psychic Pokemon like Gallade and Giratina much easier to handle as well as some other niche hurdles like Lugia and Zapdos. Much like Mountain Ring and Sky Pillar however, the long term effectiveness of this stadium without the help of stadium recovery might not be a very effective solution.
As my madness took over I even considered Weakness Policy to remove my Psychic weakness, as it does allow Dogi to survive a hit even if it’s taken some damage as opposed to Focus Sash. However I found this card to be way too niche to provide any consistent value for every other matchup bar Grass. It was when I found myself testing Struggle Gloves that it dawned on me that I was pursuing a white whale. I was overcooking my list. I needed to get out of the kitchen. Bad matchups are inevitable no matter what type you play and learning to accept that is part of the game.

Conclusion
Overall I’ve had an absolute blast revisiting Fighting in 2025. Like I said at the beginning, I still don’t consider myself to be an expert so I’d love to hear what you guys think of the list or how you’d approach it differently. With the ever expanding card pool of the GLC formatt, I would highly encourage anyone to go back and look at some older archetypes that haven’t been seeing a lot of play lately and see what you can cook up using some newer cards. I’m always excited to see what will emerge from this community with every new set as well as the new found relevance older cards and strategies can find with every new addition.
jordanM