GLC Water Deck - Wailord Control

Leviathan
Thanks for tuning in for another article! I am happy to present Wailord Control, also known as Leviathan. If you enjoy having precise control over your deck and discard pile, playing through fun decision trees and pushing your opponent into strange and unusual situations, this article is for you!
Background
Water has long been a type I didn’t feel a connection with. Leo crafted a beautiful Ursaluna control deck that I played a lot and quickly grew to love. I really enjoyed the playstyle of depleting the opponent’s resources and setting up a difficult-to-deal-with threat while also recurring important resources to put your opponent away at the right moment.
After spending time with Ursaluna, I wanted to branch out and find the next “Ursaluna” deck. Water immediately came to mind with Wailord’s intimidating board presence and the unique abilities and tools it has to tutor cards to hand from the deck or the discard pile. I once tried a tank and heal Wailord deck that used Quagsire to move Energy around the board while healing damage with cards like Max Potion and Mallow and Lana. I had some success with this style of play, but ultimately I ended up unsatisfied with it as it was too dependent on a specific board state that was easy to disrupt.
This time around with my newfound knowledge from playing Ursaluna control, I knew what my previous shortcomings were and how I could fix them.
Without further ado, here is my current list:
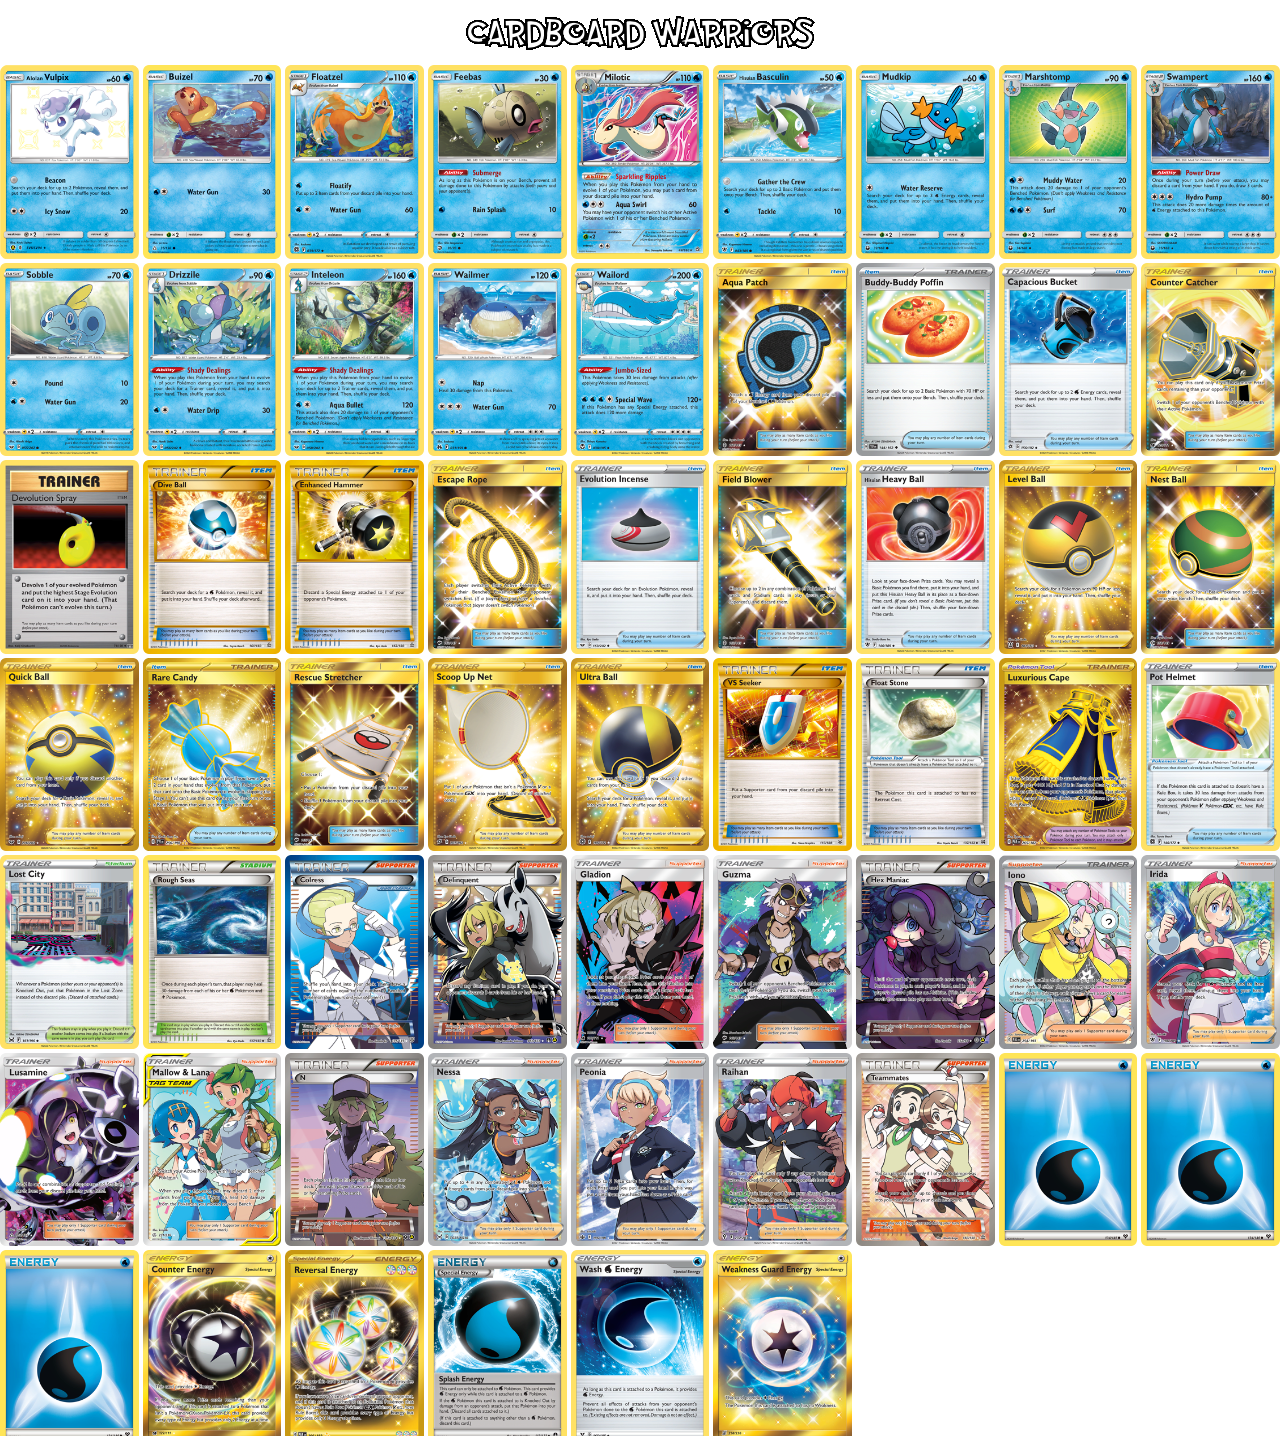
There are stages of play with this deck that - in an ideal situation - you can cycle through to come to a relatively straightforward win. Let’s first walk through that scenario.
Early Game
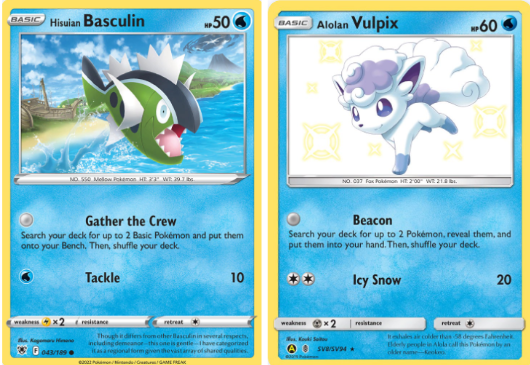
For the early game, we have Alolan Vulpix and Hisuian Basculin as our ideal starters whose free nature setup attacks are quite powerful. I run both options because setup is paramount in this deck. Without a board, we will most certainly lose. My preferred starter is Alolan Vulpix, but in a pinch, Hisuian Basculin works well. Because this list isn’t running many setup or draw supporters, Vulpix keeps us from having a dead hand without much to do. While there will most certainly be times where your opponent immediately disrupts your hands, I’ve found that it isn’t the end of the world and slows you down just a bit.
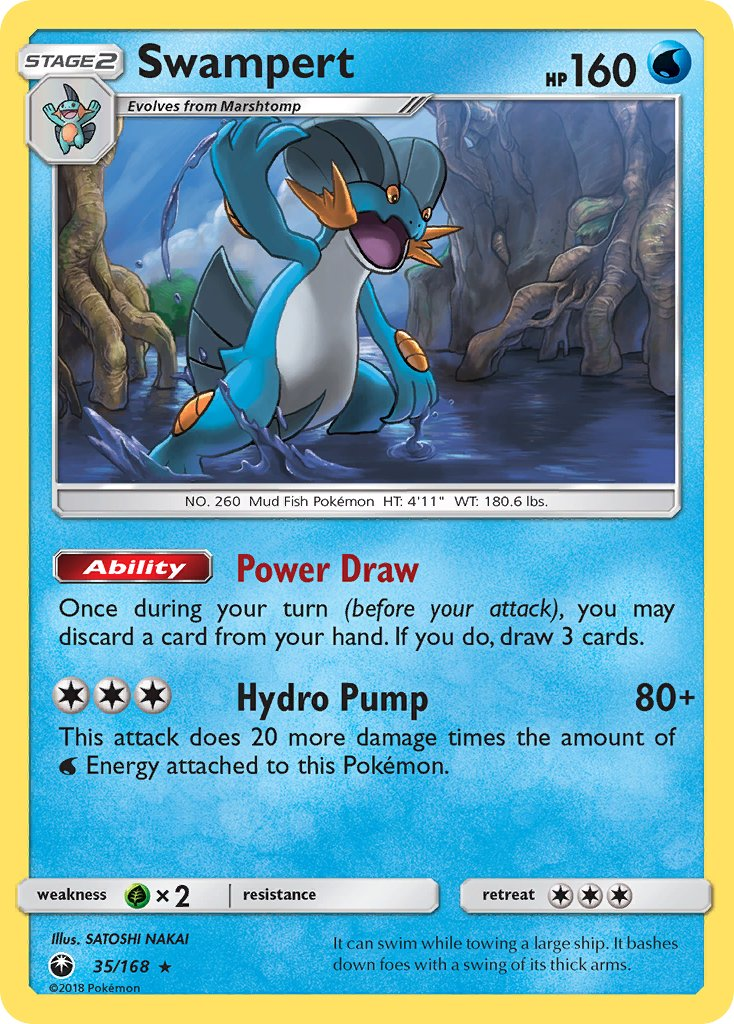
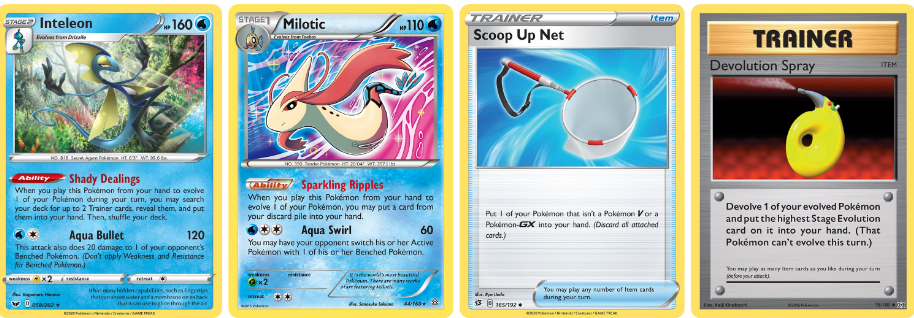
Using Vulpix, the setup plan is to get Sobble and Mudkip down as fast as possible and follow up with Drizzile for Irida for Swampert + Rare Candy. With this common turn 2 or turn 3 setup, we have many tools at our disposal to deal with aggressive opponents or set up our board even further. It’s important to have Swampert down for immense draw power and deck thinning, while being prepared for an Inteleon play to have some control over the game.
The next most important setup objective is Floatzel. After you have Swampert online, your opponent is most likely taking a KO on Vulpix or gusting Drizzile. This is okay! Going down on prizes is part of how this deck wants to start the game.
Mid Game
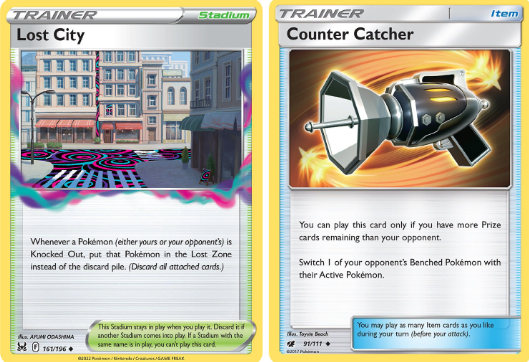
Mid game starts with us down on prizes and finding our opponent’s win condition. If Enhanced Hammer is important, we want to use it as early as possible. If Hex Maniac is important, let’s make sure to get it played ASAP as well as VS Seeker. In most every game, you’ll want to use Counter Catcher after the first knock out. This begins the resource war. If your opponent doesn’t have an immediate response to Counter Catcher, you’re usually cooking.
As I mentioned previously, setting up Floatzel is necessary for this stage of the game. Floatzel is a key player in control because it recovers so many important cards including Counter Catcher, Enhanced Hammer, VS Seeker, Dive Ball, Escape Rope, etc. It’s not uncommon to be able to safely put Luxurious Cape on Floatzel because certain types can’t one-shot the Floatzel (Dragon, Fighting, Fire, Metal, I’m looking at you).
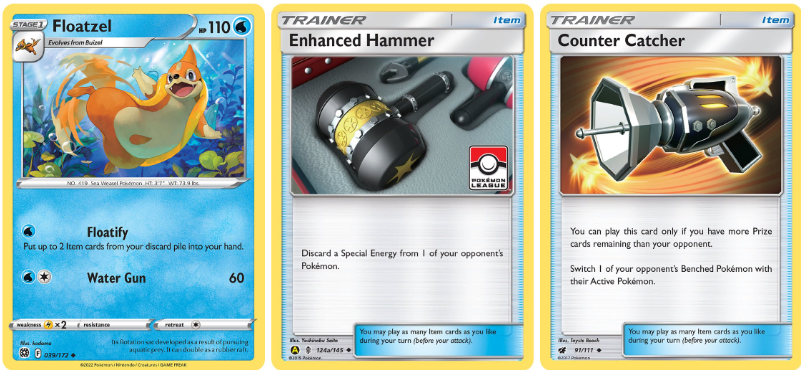
The second and sometimes parallel usage of Floatzel is to recover Scoop Up Net and/or Devolution Spray from your discard pile. Playing Scoop Up Net on Inteleon gives you multiple additional turns of tutoring the perfect Trainer card to your hand, and using Devolution Spray on Milotic gives you another turn of Sparkling Ripples. Floatify enables all of this.
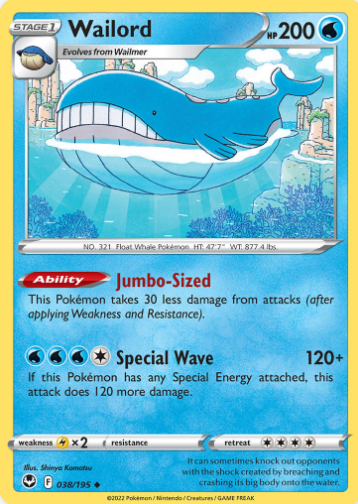
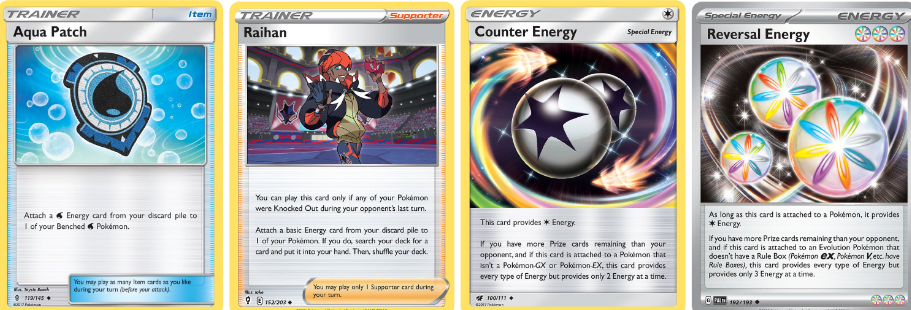
Once Floatzel starts crunching your opponent’s resources, you can get Wailord online (though sometimes this is necessary to do earlier depending on your opponent’s current threat level).. This deck runs no energy acceleration Pokemon, so we’re reliant on cards like Aqua Patch, Raihan, Counter Energy and Reversal Energy for our first Wailord attack.
Because of the controlling nature of this deck, I’ve never felt the need, nor wanted to consume the bench space for a card like Frosmoth or Baxcalibur. The goal is to never let Wailord die, not set up another one quickly.
Attacking Phase
Now that you’ve been attaching turn after turn to Wailord and stalling out your opponent with broken item cards, it’s time to bring in the Wail. But make sure it’s the right time! If it’s not, Wailord will die. Don’t let Wailord die! The key to not letting Wailord die is to pick out your opponent’s biggest threat. Their biggest threat could be Venusaur doubling energy to let Zarude hit 260, it could be Mimikyu + Field Blower, it could be Fast Call or Buddy Catch, it could be Snorlax + Powerful Energy + Hex Maniac. There are many potential threats to Wailord, and the appropriate answer is to use the most broken card in GLC, Lost City.
Lost City single handedly destroys some of the top meta decks like Lost Zone Psychic, Turbo Snorlax and opposing whale decks.
If you’ve been Power Drawing each turn with Swampert, scooping up your Inteleon, and Devolution Spraying your Milotic (or even some combination of these), you are almost certain to have the tools available to power up Wailord on the same turn you use Counter Catcher and Lost City to send your opponent’s biggest threat to the shadow realm.
To execute this devious combo, you will probably need 4 cards: Reversal Energy or Counter Energy, Lost City, Counter Catcher and one of Pot Helmet or Luxurious Cape. You want to make sure Wailord is wearing a tool if you sense your opponent might have the range to revenge KO Wailord.
Staying Alive Phase
Now that your opponent’s biggest threat is dealt with, it’s time to keep the Whale alive! We have several ways to do this:

With Mallow & Lana and Rough Seas healing, it’s possible to take many hits from your opponent’s attackers. You can use Pot Helmet to add to Wailord’s existing damage reduction, making it take a total of 60 less damage from attacks, or Luxurious Cape to give it a ridiculous 300 HP. It’s easy to reuse Rough Seas by looping it with Lusamine and Milotic if it gets removed, and you can use a similar tactic to use Mallow & Lana multiple times.
As your opponent stares down the Leviathan standing before them, they will probably realize that their route to victory is not to kill Wailord at all, but to go after your bench.

Gusting or sniping around Wailord is the correct strategy to take down Leviathan. Be very aware of your opponent’s reach when it comes to taking multiple prizes. Guzzlord, Articuno, Raikou and other spread attackers can all take double prize turns on this deck. Watch your prize count as it dwindles, and pay attention to what resources your opponent has left. Have they used Boss, Guzma, VS Seeker? Does their archetype play Pal Pad, Lusamine, Cynthia & Caitlin? If you can count their outs, you know what you need to do to win.
If you’re caught in a lurch with your opponent ignoring Wailord, don’t be afraid to scoop up your bench sitters and make them deal with Leviathan.
You can breathe a sigh of relief though, Lost City will make sure your opponent doesn’t even have any attackers left to snipe your bench if you play your cards right.

We’re in Trouble Phase
If you find yourself being Hexed, early and often, your opponent constantly disrupting your hand, very very unlucky prizing, or they send your Wailmer to the Lost Zone (or any other number of other things that can go wrong), you still have a chance. Water has some of the best role compression in all of GLC. That’s right, both Inteleon and Swampert can have 260 HP if equipped with Luxurious Cape, and they’re both great attackers!
The usual plan doesn’t involve attacking with your support Pokemon since losing them can mean you have less control over the game. But if the game is already out of control, always play to your outs!
We’ve Won Phase
If you’re sleeving this up, you’re already a step ahead. This is a really fun deck to play and it can withstand almost any assault. Going back to other types after you become accustomed to 10-15 card hands and Shady Dealings tutoring can be quite a let down. I hope you enjoy playing Leviathan!
Appendix
Alternatives
Every meta is different, first and foremost. That being said, here are some alternatives that you should consider when looking at your local meta. In mine, I chose to cut Weakness Guard Energy for Reset Stamp to deal with Psychic opponents (it worked out and I went 4-0 facing no Lightning!)
- Reset Stamp is the first addition I would make to this list after making any cuts. Reset Stamp + Delinquent is absolutely game ending sometimes, and often your opponent doesn’t see it coming. Even if you’re not deleting their entire hand, you are often forcing them to make difficult decisions about what to discard and removing important resources.
- Manaphy is absolutely broken against spread decks. Bench barrier forces your opponent to have a much higher number of cards in hand to beat you, and it protects your important bench assets and support Pokemon. Fortunately this list has several healing options and Scoop Up Net for removing liabilities, but if you face many spread players or see Turbo Raikou in your future, Manaphy is a great choice.
- Weakness Guard Energy is perfect if your meta has lots of Lightning. It can go far to keep Wailord alive.
- Eri is the last alternative I’ll mention. Field Blower and Lost Vacuum can potentially threaten if your opponent assembles a massive combo to take down Wailord, but it’s highly unlikely that they have everything they need all at once. Many times though, they’ll hang on to cards turn after turn waiting for the time to strike, and this is where Eri shines.
Threats
- Opposing Wailords with Shady Dealings support can one shot your own Wailord. Be sure to get yours online first if at all possible and lost zone theirs.
- Mimikyu is tough to deal with. If your opponent is playing Psychic, there is a high likelihood they have the Mimikyu + Field Blower combo lurking at all times. This is where Reset Stamp + Delinquent come in handy. Sometimes, however, you have to completely avoid Wailord attacking and leave it waiting in the wings while Inteleon and/or Swampert do the dirty work.
- Turbo Raikou in its entirety is a major threat. If you can, send Raikou to the Lost Zone before it ends you. Manaphy is definitely a must if a list like this is devouring your meta.
- Hex Maniac - what can you really do? Just be aware of the game state and when it would be a big problem for you.
- Hand Disruption can be an issue if you aren’t thinning constantly with Swampert or don’t have Shady Dealings prepared with lots of search outs left in the deck. The only way to avoid this is to know where your relevant cards are and if you’d rather have them in the discard pile or back in your hand before N, Iono or Marshadow hit you.